
How to Build an Outdoor Kitchen: Complete DIY Guide
Learning how to build an outdoor kitchen transforms your backyard into a functional entertainment hub that extends your living space and adds real value to your home. Whether you’re hosting summer barbecues or fall gatherings, an outdoor kitchen lets you cook, serve, and entertain without constant trips inside. This guide covers everything from planning and budgeting to installation and seasonal maintenance.
Why an Outdoor Kitchen Transforms Entertaining
An outdoor kitchen eliminates the disconnect between cooking and socializing. You can grill steaks, prep sides, and keep drinks cold while staying engaged with guests. Beyond entertainment, outdoor kitchens increase property value, create a dedicated cooking zone, and make hosting larger groups practical and enjoyable.
The best outdoor kitchens match your lifestyle. Summer entertaining demands different features than fall hosting, and your budget determines whether you go full DIY or hire professionals for specific tasks.
Planning Your Outdoor Kitchen
Site Assessment: Location Matters
Start by evaluating your backyard layout. Choose a spot with:
- Proximity to the house: Close enough for utility connections and guest flow, but far enough to avoid heat and smoke near windows
- Sun exposure: Morning or afternoon shade keeps cooking comfortable; full sun creates heat challenges
- Wind patterns: Avoid areas where prevailing winds push smoke toward neighbors or seating areas
- Drainage: Ensure water runs away from the kitchen and foundation
- Ground stability: Level ground prevents equipment shifting; soft soil may need compacting or gravel base
If your backyard is tight on space, check out our guide on how to maximize a small backyard for layout strategies that work with limited square footage.
Layout Options
Three primary layouts dominate outdoor kitchen design:
- Linear (Straight Line): Grill, counter space, and storage in a single row. Best for narrow yards and small entertaining groups. Easy to build and budget-friendly.
- L-Shaped: Creates two working zones and accommodates more prep space. Works well for medium yards and mixed entertaining styles.
- U-Shaped: Maximizes counter and storage, creates a central workspace, and accommodates larger gatherings. Requires more space and budget.
Sketch your layout on paper first. Measure distances from the house, note utility locations, and account for foot traffic patterns.
Seasonal Considerations
Summer entertaining emphasizes shade, cooling, and quick-cooking appliances. Fall hosting requires weather protection, heating options, and durable materials that withstand temperature swings. Plan your kitchen to serve both seasons—add a pergola for summer shade, and consider a fire feature or heater for fall comfort.
Budget Planning: DIY vs. Professional Installation
DIY Approach (Budget-Friendly)
Cost range: $2,000–$8,000
DIY outdoor kitchens work best for straightforward builds: a grill island with concrete countertops, basic storage, and minimal utility work. You handle site prep, assembly, and finishing. This saves labor costs but requires:
- Basic carpentry and concrete skills
- Access to tools (or rental budget)
- Time for research and troubleshooting
- Willingness to handle mistakes
Hybrid Approach (Balanced)
Cost range: $8,000–$15,000
Hire professionals for electrical, plumbing, and gas work; handle framing, countertops, and finishing yourself. This reduces risk while keeping costs moderate.
Professional Installation (Premium)
Cost range: $15,000–$50,000+
Full professional builds include design consultation, permitting, installation, and warranty. Best for complex designs, multiple utilities, or high-end materials.
Essential Components for Your Outdoor Kitchen
Grill: The Centerpiece
Choose between gas, charcoal, or hybrid grills. Gas grills heat quickly and offer temperature control; charcoal delivers flavor but requires more attention. Built-in grills (30–40 inches) anchor the kitchen and cost $500–$3,000. Portable grills ($200–$800) work for renters or trial runs.
Countertops and Work Surfaces
Concrete, stainless steel, granite, and composite materials all work outdoors. Concrete is affordable ($15–$30 per square foot) and customizable; granite costs more ($50–$100 per square foot) but lasts decades. Stainless steel resists weather and cleans easily but shows fingerprints.
Storage Solutions
Outdoor cabinetry keeps tools, seasonings, and serving pieces organized. Stainless steel or marine-grade polymer cabinets resist rust and moisture. Plan 3–4 linear feet of storage minimum. Budget $300–$1,500 depending on material and size.
Utilities: Gas, Water, and Electrical
Gas lines require licensed installation and permits. Water lines enable prep sinks and cleaning. 110V or 240V electrical powers refrigerators, lighting, and small appliances. These utilities often require professional installation and represent 20–30% of total project cost.
Seating and Shade
A pergola, umbrella, or retractable awning makes cooking and dining comfortable. Bar seating near the counter encourages guest interaction. Budget $1,000–$5,000 for shade structures.
Step-by-Step DIY Installation Guide
Phase 1: Foundation and Framing
Step 1: Prepare the Site
- Clear the area and remove grass or debris
- Level the ground or build up low spots with compacted gravel
- Mark the kitchen footprint with chalk or string
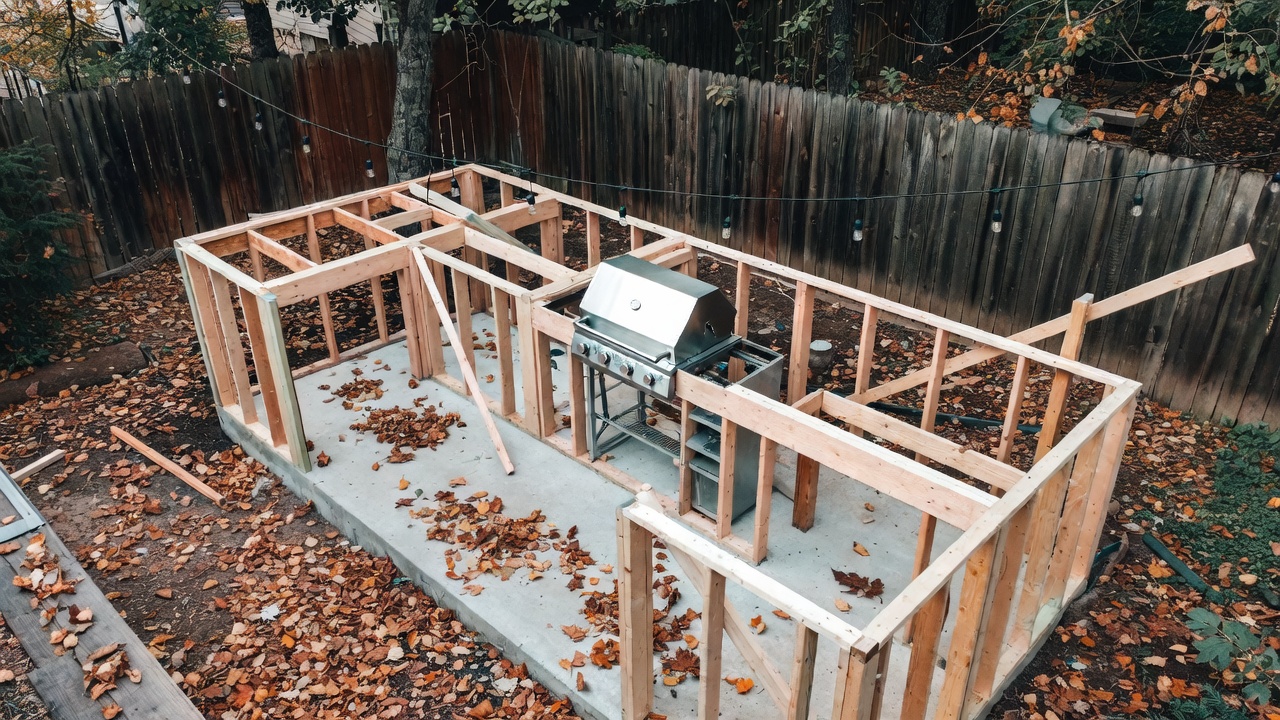
Step 2: Build the Base Structure
- Pour a concrete pad (4 inches deep, reinforced with rebar) or lay permeable pavers for drainage
- Allow concrete to cure for 7 days before building on it
- Frame the island or counter structure using pressure-treated lumber (2x4s or 2x6s)
- Secure framing with galvanized bolts and brackets to prevent wood rot
Step 3: Install Countertops
- For concrete: build forms, pour mix, finish smooth, and seal with outdoor sealant
- For stone or composite: secure with adhesive and grout; seal seams
- Ensure proper slope (1/8 inch per foot) for water drainage
Phase 2: Equipment and Appliance Installation
Step 4: Mount the Grill
- Position the grill in the center of the counter or island
- Secure with galvanized brackets bolted to the frame
- Ensure the grill sits level and stable
- Connect gas or charcoal as per manufacturer specs
Step 5: Add Storage and Accessories
- Install cabinets below countertops, securing to the frame
- Add shelving for tools and supplies
- Mount hooks for towels and utensils
Phase 3: Finishing and Utilities
Step 6: Utilities (Hire Professionals)
- Licensed electrician installs outdoor outlets and lighting
- Licensed plumber runs water and drain lines
- Licensed gas fitter connects propane or natural gas
Step 7: Sealing and Weatherproofing
- Seal wood framing with outdoor stain or sealant
- Seal concrete countertops with food-safe sealant
- Caulk gaps and seams to prevent water infiltration
Step 8: Add Finishing Touches
- Install lighting (string lights, LED strips, or fixed fixtures)
- Add a pergola or shade structure
- Landscape around the kitchen with pavers or mulch
Professional Considerations: Permits, Codes, and Safety
Permits and Inspections
Most jurisdictions require permits for outdoor kitchens, especially those with gas, electrical, or plumbing. Permits ensure:
- Proper setback distances from property lines and structures
- Electrical work meets code (typically 6–8 feet from water sources)
- Gas connections are safe and compliant
- Drainage doesn’t affect neighbors or the foundation
Contact your local building department before starting. Permit costs range from $50–$500 depending on project scope.
Electrical Safety
Outdoor outlets must be GFCI-protected (ground fault circuit interrupter) to prevent shock. All wiring should be buried or protected conduit. Hire a licensed electrician—this isn’t a DIY task.
Gas Safety
Propane and natural gas lines require licensed installation. Improper connections risk leaks and fire. Always hire a certified gas fitter.
Building Codes
Codes vary by location but typically cover:
- Setback distances (usually 3–10 feet from structures)
- Clearance above grills (typically 10–12 feet)
- Slope and drainage requirements
- Material fire ratings for structures
Design Ideas for Summer and Fall Hosting
Summer Entertainment Setup
Maximize shade and cooling for summer gatherings:
- Pergola with shade cloth: Blocks 50–90% of sun while allowing airflow
- Beverage cooler: Built-in ice maker or refrigerator keeps drinks cold
- Misting system: Overhead misters drop temperature 10–15 degrees
- Light-colored countertops: Reflect heat and stay cooler to the touch
- Quick-cooking appliances: Side burners and griddles speed up meal prep
Fall Hosting Setup
Create warmth and comfort for autumn entertaining:
- Fire feature: Fireplace or fire pit adds warmth and ambiance
- Heating lamp or patio heater: Extends outdoor time into cooler months
- Durable seating: Weather-resistant furniture handles temperature swings
- Lighting: String lights and lanterns create cozy atmosphere
- Smoker or pizza oven: Slower-cooking appliances suit fall entertaining
For more seasonal hosting ideas, review our September fall home maintenance checklist to prepare your entire outdoor space.
Maintenance and Seasonal Prep
Year-Round Maintenance
Monthly:
- Clean grill grates and interior
- Wipe down countertops and seal if needed
- Check for standing water or drainage issues
Quarterly:
- Inspect wood framing for rot or pest damage
- Test electrical outlets and lighting
- Check gas connections for leaks (use soapy water; bubbles indicate a leak)
Fall Preparation
As temperatures drop, prepare your kitchen for seasonal changes:
- Seal any new cracks in concrete or stone
- Drain water lines if you live in a freezing climate
- Inspect and repair weatherstripping on cabinet doors
- Test heating elements and fire features
- Clean and inspect the grill before heavy fall use
Winter Storage
In harsh climates, protect your kitchen:
- Cover the grill with a fitted cover
- Shut off gas at the tank
- Drain propane lines if disconnecting the grill
- Remove or cover cushions and accessories
- Inspect the structure for ice dam potential
Cost Breakdown and ROI
Typical Budget for a DIY Mid-Range Kitchen (Linear Layout)
- Concrete pad and framing: $800–$1,500
- Built-in grill: $800–$2,000
- Countertops: $1,000–$2,500
- Storage cabinets: $600–$1,500
- Utilities (electrical, gas, water): $1,500–$3,000 (professional)
- Shade structure (pergola): $1,000–$3,000
- Finishing (lighting, landscaping, sealing): $500–$1,500
- Total: $6,200–$15,500
Return on Investment
Outdoor kitchens recoup 50–75% of their cost at resale, depending on quality and local market demand. Beyond ROI, the real value lies in years of entertaining, family gatherings, and extended outdoor living. A well-built outdoor kitchen pays for itself through use and enjoyment.
Getting Started with Your Outdoor Kitchen Project
Building an outdoor kitchen is a manageable project for homeowners with basic DIY skills and realistic timelines. Start by assessing your site, sketching a layout, and determining your budget. Decide which tasks you’ll handle and which require professionals—utilities and permits are non-negotiable for safety and code compliance.
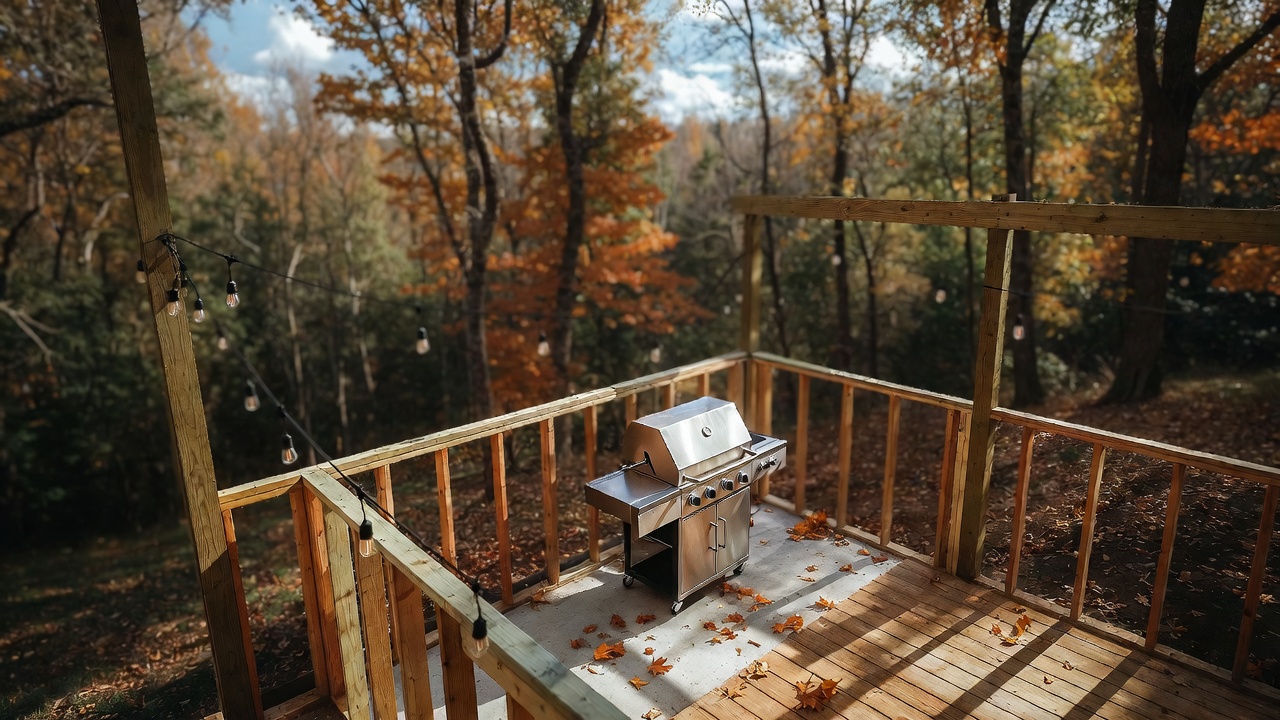
Plan your kitchen to serve both summer and fall entertaining. A linear layout works for tight budgets; L-shaped or U-shaped designs offer more flexibility as your needs grow. Focus on durable materials, proper drainage, and weatherproofing to ensure your kitchen lasts decades.
As you plan your outdoor space, consider complementary upgrades like artificial turf installation or improved landscaping to create a cohesive entertaining zone. With careful planning and realistic expectations, your outdoor kitchen will transform how you host and enjoy your backyard.