Why August Is Still Worth Acting On
Most homeowners mentally check out of summer energy-saving mode by mid-July. That’s a mistake. August routinely delivers some of the year’s highest cooling degree days, and your air conditioner is still running hard — often during the same peak-rate hours that inflated your June and July bills. According to the Energy Trust’s summer comfort guidance, simple, low-cost home improvements can meaningfully reduce cooling loads without touching your thermostat setting.
The good news: you don’t need a contractor or a big budget. The fixes below are ranked by impact-per-dollar. Most cost nothing or under $30, and the majority of them double as weatherization upgrades that keep working all winter. Even if you only act on two or three items, you can realistically trim your August electricity bill by 10–20% — and carry those savings straight into heating season.
Section 1: Seal Air Leaks Fast
Where the Biggest Leaks Hide
Air sealing consistently ranks as the highest-return DIY energy upgrade available to homeowners. The problem is that most people look for leaks in the wrong places. The biggest culprits are rarely obvious cracks in walls. Instead, focus here:
- Exterior door frames: Hold a lit incense stick or a thin piece of tissue near the door frame on a windy day. Any flutter means conditioned air is escaping — or hot outside air is pushing in.
- Window frames and sashes: Pay special attention to older double-hung windows where the sash meets the frame. The gap is often invisible but significant.
- Attic hatch: An unsealed attic hatch is essentially a hole in your ceiling. Hot attic air (which can exceed 140°F in August) pours directly into your living space every time the pressure differential shifts.
- Recessed light fixtures: Standard can lights that penetrate the ceiling into an unconditioned attic are major air-bypass points. They’re also a fire-safety issue if improperly insulated.
- Plumbing and electrical penetrations: Anywhere a pipe or wire passes through an exterior wall or ceiling is a potential leak.
DIY Fixes: Weatherstripping and Caulk
For door frames and window frames, self-adhesive foam weatherstripping tape handles most gaps. Measure the perimeter of each door, buy a roll rated for compression (V-strip or EPDM foam), and press it into place. Total time per door: 15 minutes. Cost: $5–$8 per door.
For window frames and any static joint between dissimilar materials (wood frame to brick, trim to drywall), use paintable acrylic latex caulk. Cut the tip small — a 3mm bead is plenty — and tool it smooth with a wet finger. A single tube ($4–$6) can seal an entire room’s worth of windows.
For the attic hatch, cut a piece of rigid foam board (2-inch polyiso is ideal) to fit the top of the hatch door, glue it in place with foam-compatible adhesive, and add weatherstripping around the frame perimeter. Materials cost: under $20. The payback in both summer cooling and winter heating is typically measured in weeks, not years.
For recessed lights, use pre-made airtight covers (sold as “recessed light covers” or “IC covers”) that sit on the attic side over each fixture. They run $8–$15 each and install in minutes with no wiring involved.
Estimated total cost for a typical home: $30–$80. Estimated annual savings: $150–$300, depending on climate and existing leakage.
Section 2: Master Your Blinds and Window Coverings
Which Windows to Close and When
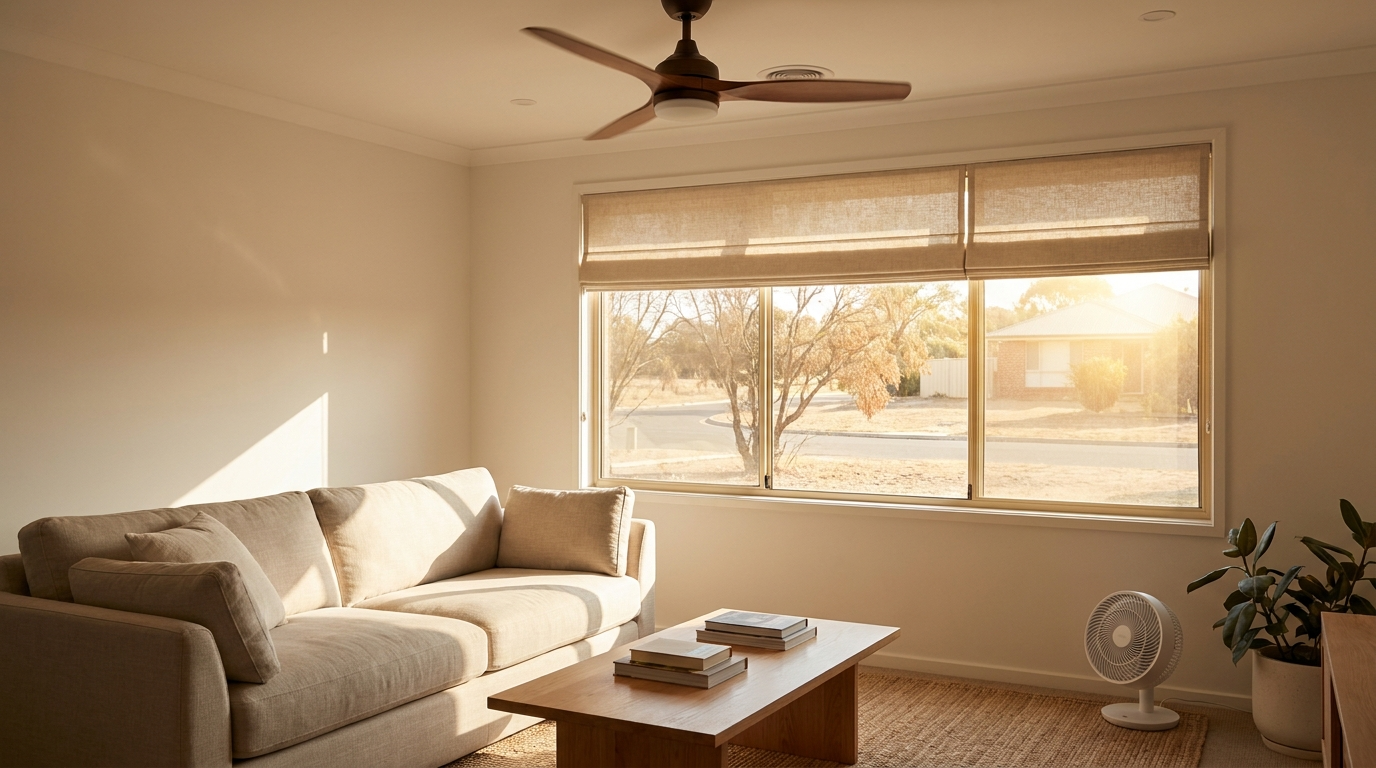
Solar heat gain through glass is one of the largest single contributors to afternoon cooling load. The physics is simple: south- and west-facing windows receive direct sun during the hottest part of the day (roughly noon to 6 p.m. in August). A standard single-pane window can transmit 200 BTUs per square foot per hour of direct sun. Close your south- and west-facing coverings by late morning and keep them shut until the sun moves off that glass. East-facing windows can stay open in the afternoon; they’re in shade by then.
Blind and Shade Options: What Actually Works
- Cellular (honeycomb) shades: The best-performing option for insulation. The air pockets in the cells resist both heat transfer and cold drafts. Double-cell versions outperform single-cell. Cost: $30–$80 per window. If you’re buying new coverings, this is where to spend the money.
- Blackout curtains: Block light effectively and reduce radiant heat gain significantly. They work best when hung close to the glass and allowed to drape to the floor, minimizing air circulation between the curtain and the window. Cost: $20–$50 per panel pair.
- Standard horizontal blinds: Better than nothing, but they leave gaps at every slat and don’t insulate well. If these are what you already have, close them fully and angle the slats upward on south- and west-facing windows to reflect sunlight toward the ceiling rather than into the room.
- Free option — reflective film: Removable static-cling window film ($10–$20 per roll) can cut solar heat gain by 40–60% on problem windows. It peels off cleanly in autumn.
Free Wins Right Now
Before spending anything, simply close your south- and west-facing blinds every morning before you leave for work. This single habit, applied consistently through August, can reduce your afternoon cooling load noticeably — no tools, no purchases required.
Section 3: Use Fans the Right Way
Ceiling Fan Direction for Summer
This is one of the most repeated — and most often ignored — pieces of cooling advice: your ceiling fan must spin counter-clockwise in summer (when viewed from below). This pushes air straight down, creating a wind-chill effect on skin. The result is that most people feel comfortable at a thermostat setting 4°F higher than they otherwise would, which translates directly to compressor run-time savings.
Check the direction switch on the motor housing. It’s a small slider, usually on the side of the motor. Flip it, then run the fan on medium or high. If you feel a breeze standing beneath it, it’s set correctly for summer.
Box Fans and Window Fans for Night Ventilation
In most of the continental U.S., August nights drop to the low-to-mid 70s°F or cooler. That’s free cooling — if you use it. The strategy: once outdoor air drops below your indoor temperature (typically after 9–10 p.m.), open windows on opposite sides of the house and position a box fan to exhaust air from the warmest room. Cool air is drawn in through the other windows. Run this cross-ventilation for 2–3 hours, then close everything up before the outdoor temperature rises again in the morning.
The Critical Rule: Fans Cool People, Not Rooms
A fan running in an empty room wastes electricity and adds a small amount of heat from its motor. Turn off ceiling fans and portable fans whenever you leave a room. This is not a minor point — a ceiling fan running 24/7 can add $5–$10 to your monthly bill while cooling no one.
Section 4: Cut Hot-Water Costs
Lower Your Water Heater to 120°F
Most water heaters ship from the factory set to 140°F. The Department of Energy recommends 120°F for most households — hot enough to kill legionella bacteria, cool enough to reduce standby heat loss and scalding risk. Dropping from 140°F to 120°F typically saves $36–$61 per year on a gas heater and $40–$75 on an electric unit. In August, it also means less waste heat radiating into your utility room or basement.
To adjust: turn off power to the heater at the breaker (electric) or turn the gas valve to “pilot” (gas). Remove the access panel(s), locate the thermostat dial behind the insulation, and turn it to 120°F. Replace the panel, restore power, and wait 2–3 hours before testing water temperature at a tap. Total time: 20 minutes. Cost: free.
Insulate the First Few Feet of Hot-Water Pipes
The pipes immediately exiting your water heater lose heat rapidly to the surrounding air. Foam pipe insulation sleeves (sold in 6-foot sections for $1–$3 each) slip directly over the pipes and are secured with tape. Insulate the first 3–6 feet of both the hot-water outlet pipe and the cold-water inlet pipe. This reduces standby losses and means hot water arrives at your fixtures faster, wasting less water while you wait for it to warm up.
Switch to Cold-Water Wash Cycles
Roughly 90% of the energy used by a clothes washer goes toward heating water. Modern detergents are formulated to work effectively in cold water. Switching every load from warm to cold saves approximately $0.25–$0.50 per load — modest per cycle, but meaningful across a full month of laundry. In August, it also keeps that heat out of your home entirely.
Quick payback math: Pipe insulation ($6–$9 in materials) + thermostat adjustment (free) + cold-water washing (free) = potential savings of $15–$25 in August alone, with the pipe insulation and thermostat change continuing to pay back every month of the year.
Section 5: Reduce Heat from Lighting and Appliances
Replace Remaining Incandescent and Halogen Bulbs with LEDs
An incandescent bulb converts only about 10% of its energy into light. The other 90% becomes heat — heat your air conditioner then has to remove. A 60W incandescent replaced by a 9W LED saves roughly 51W of electricity per hour of use. In a home with 20 such bulbs running an average of 5 hours per day, that’s over 50 kWh saved per month. At the national average rate of $0.16/kWh, that’s $8/month — plus the reduction in cooling load.
LED bulbs now cost $2–$5 each and last 15,000–25,000 hours. If you still have any incandescent or halogen bulbs in your home, replacing them is one of the fastest-payback upgrades available. Check high-use fixtures first: kitchen, living room, bathroom vanity.
For more quick-win home upgrades that pay back fast, see our guide to effortless DIY home projects that transform your space fast.
Shift Appliance Use to Cooler Hours
Your oven, dishwasher, and clothes dryer all generate significant heat. Running them during the hottest part of the day (noon to 7 p.m.) forces your AC to work harder at the exact moment it’s already under peak load. Shift these tasks:
- Dishwasher: Run after 8 p.m. or before 8 a.m. Use the air-dry setting instead of heated dry — it’s slower but adds zero heat to your kitchen.
- Clothes dryer: Run in the morning or late evening. Better yet, line-dry in August — outdoor air is warm and dry enough to handle most loads in 1–2 hours.
- Oven: Use a countertop toaster oven, air fryer, or microwave for small meals. These appliances generate a fraction of the heat of a full-size oven. Reserve oven use for evenings after 7 p.m. when outdoor temps are dropping.
- Slow cooker: Generates less heat than an oven and can cook during off-peak hours without supervision.
Unplug Vampire Loads
Devices in standby mode — TVs, gaming consoles, phone chargers, cable boxes, desktop computers — draw power continuously even when “off.” The Lawrence Berkeley National Laboratory estimates that vampire loads account for roughly 10% of a typical home’s electricity use. In August, that wasted electricity also becomes waste heat. Use smart power strips or simply unplug entertainment systems and chargers when not in use. Cost: free to $25 for a smart strip.
Quick-Win Checklist: Everything in One Place
Use this checklist to work through the article’s actions systematically. Estimated costs are per fix, not whole-house.
- ☐ Apply weatherstripping to exterior doors — Under $10 per door
- ☐ Caulk window frames and static gaps — Under $10 (one tube covers multiple windows)
- ☐ Seal and insulate attic hatch — Under $30
- ☐ Install recessed light covers in attic — Under $30 for 2–3 fixtures
- ☐ Close south- and west-facing blinds by late morning — Free
- ☐ Add blackout curtains or cellular shades to worst windows — Under $30 per window (budget options)
- ☐ Apply removable solar film to problem windows — Under $30
- ☐ Flip ceiling fan to counter-clockwise (summer mode) — Free
- ☐ Set up cross-ventilation with box fans at night — Free (if you own fans) / Under $30 for a new box fan
- ☐ Turn off fans when leaving any room — Free
- ☐ Lower water heater thermostat to 120°F — Free
- ☐ Insulate first 6 feet of hot-water pipes — Under $10
- ☐ Switch all laundry to cold-water wash — Free
- ☐ Replace remaining incandescent/halogen bulbs with LEDs — Under $10 per bulb; under $30 for a 6-pack
- ☐ Shift dishwasher, dryer, and oven use to morning or evening — Free
- ☐ Use air-dry setting on dishwasher — Free
- ☐ Unplug or smart-strip vampire loads — Free to under $30
Conclusion: Act Now — These Fixes Work All Year
August may feel like the tail end of summer, but your energy bills don’t know that. The fixes in this article are designed to deliver measurable results in the weeks you have left — and almost every single one of them carries over as a weatherization benefit when temperatures drop in October and November. The air sealing that stops hot air from infiltrating in August stops cold air from infiltrating in January. The LED bulbs that reduce heat gain now reduce heating load later. The water heater adjustment saves money every month of the year.
Start with the free items on the checklist today — ceiling fan direction, blind management, appliance scheduling, cold-water washing. Then pick up a tube of caulk and a roll of weatherstripping this weekend. You don’t need to complete every item to see results. Even three or four targeted fixes applied consistently through the rest of August will show up on your next utility bill.
For more practical, fast-payback home projects, browse our 5 quick DIY wins to boost your home instantly — most take under an hour and require only basic tools.