
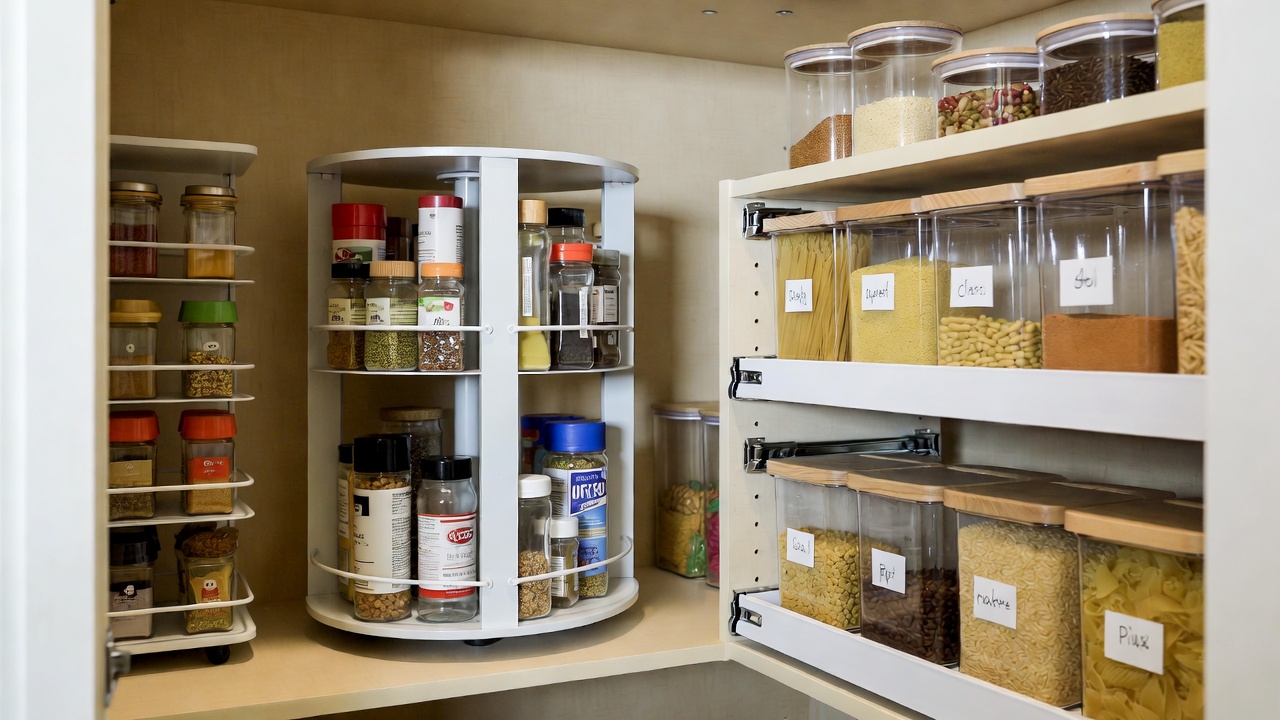
How to Organize Pantry Deep Shelves with Turntables and Pull-Out Bins
Deep pantry shelves are a blessing and a curse. They offer plenty of storage space, but items stored in the back quickly become invisible—leading to forgotten groceries, expired products, and wasted money. Learning how to organize pantry deep shelves effectively transforms your kitchen workflow and eliminates the frustration of digging through dark corners just to find a can of beans you know you have.
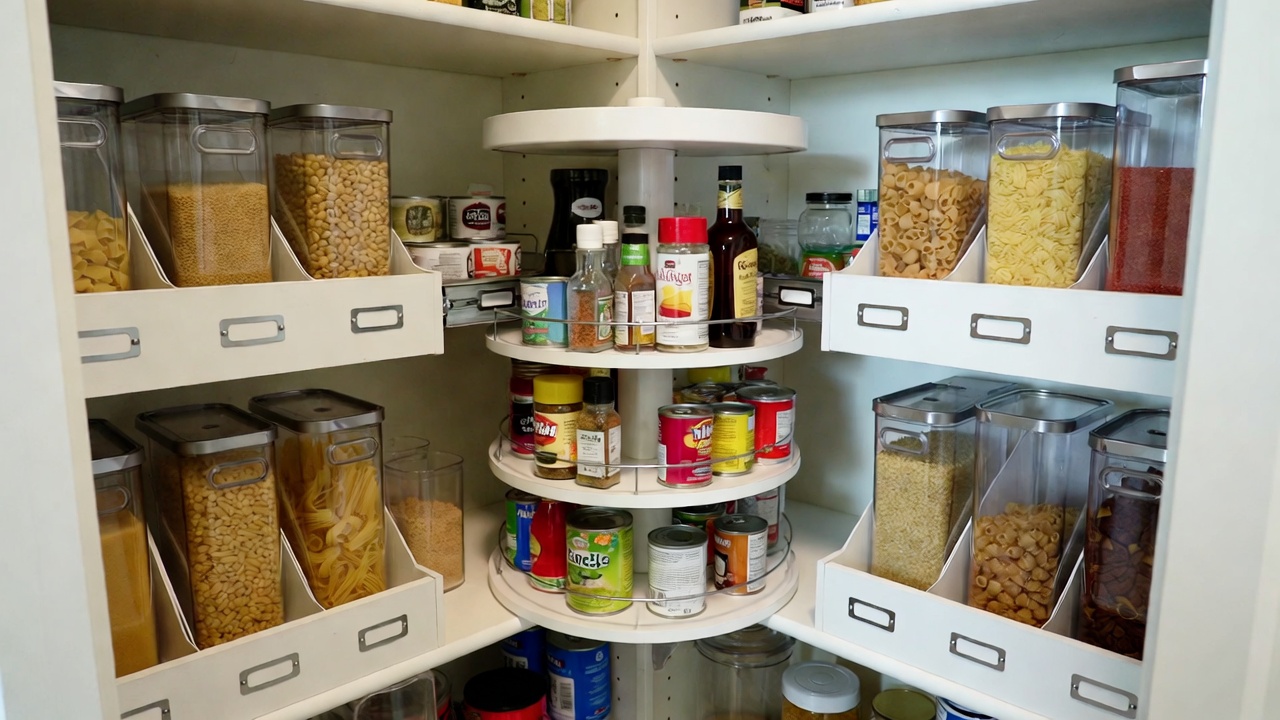
The good news: with the right tools and strategy, you can maximize every inch of deep shelving while keeping everything accessible and visible. This guide walks you through proven methods using turntables, pull-out bins, and zone-based organization to create a pantry that actually works for you.
The Challenge of Deep Pantry Shelves and Why Organization Matters
Deep shelves create a storage paradox. You can fit more items, but retrieval becomes harder. Items get pushed to the back and forgotten. You end up buying duplicates because you can’t see what you already have. This inefficiency costs time during meal prep and money through preventable food waste.
Proper organization solves these problems by making every item visible and accessible without moving other products. When your pantry is organized strategically, you spend less time searching, reduce food waste, and actually use what you buy.
Benefits of Using Turntables: Easy Access and Visibility
A lazy Susan or turntable is one of the most underrated pantry tools. Instead of reaching to the back of a deep shelf and disturbing everything in front, you simply spin the turntable to bring items forward.
Key advantages:
- 360-degree access: Rotate to find items without removing anything
- Better visibility: Items facing outward are immediately visible
- Prevents forgotten items: Nothing gets lost in the back corners
- Maximizes depth: Use the full depth of your shelf without sacrificing accessibility
- Flexible sizing: Available in multiple diameters to fit various shelf widths
Turntables work best for items you use regularly: spices, baking supplies, canned goods, and condiments. Group similar items on the same turntable so you can locate everything in one spin.
Pull-Out Bins: Maximizing Space and Simplifying Retrieval
Pull-out bins or sliding drawers take accessibility one step further. Instead of reaching into a shelf, you pull the entire bin forward, giving you full visibility and easy access to everything inside.
Why pull-out bins work:
- Complete visibility: See all items at once without rearranging
- Efficient retrieval: Grab what you need without disturbing other products
- Containment: Prevents items from rolling or shifting
- Easy inventory: Quick visual check of stock levels
- Stackable options: Multiple bins per shelf increase storage capacity
Pull-out bins are ideal for breakfast items, snacks, pasta, rice, or any category that benefits from contained, organized storage. Choose bins with smooth-gliding mechanisms so they pull out effortlessly.
Zone-Based Shelf Grouping: Categorizing for Quick Finds
Organization without a system is just rearrangement. Zone-based grouping creates a logical structure where you know exactly where to look for any item.
Common pantry zones:
- Baking zone: Flour, sugar, baking powder, vanilla, chocolate chips
- Breakfast zone: Cereal, oats, granola, breakfast bars, coffee
- Canned goods zone: Vegetables, beans, soups, tomatoes
- Pasta and grains zone: Pasta, rice, quinoa, couscous
- Snack zone: Crackers, nuts, chips, dried fruit
- Condiment zone: Oils, vinegars, sauces, spices
Assign each zone to a specific shelf or section of a shelf. Keep zones consistent so family members always know where to find items and where to return them. This system dramatically speeds up meal prep and reduces the time spent searching.
Labeling Strategies: Clear Identification for All Items
Labels are the backbone of a maintainable pantry system. Without them, organization gradually falls apart as items get misplaced.
Effective labeling methods:
- Shelf labels: Mark each zone with a label indicating its category (“Baking,” “Breakfast,” etc.)
- Container labels: Label pull-out bins with their contents
- Expiration date labels: Mark purchase or expiration dates on items, especially for baking supplies and spices
- Quantity labels: Note when items are running low to trigger reordering
- Consistent font: Use a label maker or consistent handwriting for a professional appearance
Invest in a basic label maker—it pays for itself in time saved and organization maintained. Use waterproof labels on bins and shelves to ensure they last through humidity and temperature changes.
Step-by-Step Setup Guide: Combining Turntables, Bins, and Zones
Step 1: Empty and Clean
Remove everything from your pantry shelves. Wipe down shelves and discard expired items. This gives you a blank canvas and forces you to evaluate what you actually keep.
Step 2: Measure Your Shelf Depth and Width
Accurate measurements ensure turntables and bins fit properly. Measure from the front edge to the back wall, and the full width of the shelf.
Step 3: Assign Zones to Shelves
Decide which zone goes on which shelf. Place frequently used items at eye level. Heavier items go on lower shelves. Keep specialty items (baking supplies, spices) grouped together for efficiency.
Step 4: Place Turntables on Deep Shelves
Position turntables toward the back of deep shelves. Fill them with items that benefit from rotation: spices, oils, canned goods, or condiments. Leave the front of the shelf accessible for frequently grabbed items.
Step 5: Install Pull-Out Bins
Place pull-out bins on shelves where you want maximum visibility and organization. Fill them with grouped items (breakfast foods, snacks, pasta). Ensure bins slide smoothly and don’t catch on shelf edges.
Step 6: Arrange Remaining Items
Place items that don’t need turntables or bins directly on shelves, grouped by zone. Keep similar heights together for a clean appearance and better use of vertical space.
Step 7: Label Everything
Add shelf labels identifying each zone. Label bins with their contents. Mark expiration dates on items. Use consistent labeling across all zones.
Step 8: Test the System
Live with your new organization for a week. Adjust zones or bin placement if items feel misplaced or if you find yourself reaching for things in unexpected locations.
Maintenance Tips: Keeping Your Pantry Organized Year-Round
Organization requires ongoing effort. Without maintenance, even the best system degrades within weeks.
Weekly maintenance:
- Return items to their designated zones immediately after use
- Rotate turntables when adding new items so older stock moves forward
- Check for items that have shifted out of their bins
Monthly maintenance:
- Review expiration dates and remove expired items
- Wipe down shelves and bins to prevent dust accumulation
- Check that labels are still visible and readable
- Adjust zones if you notice items consistently being placed in the wrong location
Seasonal maintenance:
- Deep clean shelves quarterly
- Reorganize zones if your eating habits change seasonally
- Replace worn or faded labels
- Assess whether turntables and bins are still serving their purpose
Set a recurring calendar reminder for monthly pantry checks. This 15-minute task prevents the slow decay of your system and keeps your pantry functional year-round.
Conclusion: Long-Term Benefits and Improved Kitchen Efficiency
A well-organized pantry with deep shelves, turntables, pull-out bins, and clear zones transforms how you cook and shop. You’ll spend less time searching for ingredients, reduce food waste, and actually use what you buy. The initial setup takes a few hours, but the time saved during meal prep and the money saved through reduced waste pay dividends for months and years.
Start with one shelf or one turntable if you’re new to this system. Once you experience the efficiency gains, you’ll want to expand the organization throughout your entire pantry. The key is consistency—maintain your zones, keep labels current, and do quick weekly check-ins to prevent backsliding.
If you’re looking for other ways to improve your kitchen space, check out our guide on small kitchen organization hacks that save space and make cooking easier. For those tackling broader home projects, explore our collection of effortless DIY home projects to transform your space fast.

2 thoughts on “How to Organize Pantry Deep Shelves with Turntables and Pull-Out Bins”